Unit Plan 1 (Grade 8 Science): Science Skills & Modeling Foundations
Kick off Grade 8 science with an NGSS-aligned unit on lab safety, measurement, graphing, and modeling matter and energy using criteria and constraints.

Focus: Build strong science practices for the year: lab norms and safety, measurement (accuracy, precision, error), graphing and data representation, and modeling matter/energy systems, including defining criteria and constraints for simple design problems. This unit lays groundwork for later work with atomic models and energy flows.
Grade Level: 8
Subject Area: Science (Physical Science • Engineering Design • Inquiry/Practices)
Total Unit Duration: 5 sessions (one week), 50–60 minutes per session
I. Introduction
Students begin the year by learning how scientists and engineers work: they use clear safety routines, make careful measurements, show data with graphs, and build and revise models of how matter and energy behave. Through quick labs and mini-challenges, students practice reading instruments, organizing data, and drawing particle models and system diagrams. They also learn to define criteria (what success looks like) and constraints (limits like materials, time, or safety) for a simple design problem. This unit prepares them for deeper work on atomic composition (MS-PS1-1) and engineering design (MS-ETS1-1) later in the year.
Essential Questions
- How do scientists and engineers keep labs safe, fair, and productive for everyone?
- What makes a measurement “good” or “trustworthy,” and how can we show data clearly with tables and graphs?
- How can models (like particle diagrams and system sketches) help us explain matter and energy when we can’t see everything directly?
- What are criteria and constraints in a design problem, and why do they matter for finding realistic solutions?
- How do strong science skills (safety, measurement, graphing, modeling) help us understand more complex science later?
II. Objectives and Standards
Learning Objectives — Students will be able to:
- Describe and follow class lab norms and safety rules, explaining why each matters for real investigations.
- Use common lab tools (e.g., digital or triple-beam balance, graduated cylinder, thermometer, stopwatch) to take measurements with appropriate units, precision, and basic error awareness.
- Organize data into tables and create graphs (bar, line, or scatter, as appropriate) with correctly labeled axes, units, and titles.
- Develop and revise simple models of matter and energy systems, including particle diagrams and input–process–output system sketches, as a preparation step for MS-PS1-1.
- Define the criteria and constraints for a small-scale design problem (e.g., insulating a cup, slowing melting, or minimizing spills) with enough precision to judge whether a solution works (MS-ETS1-1).
- Use at least two science and engineering practices (e.g., developing models, analyzing data, defining problems) in short written or verbal explanations of their lab or design work.
Standards Alignment — 8th Grade (NGSS-based custom)
- MS-PS1-1 (prep focus) — Develop models to describe the atomic composition of simple molecules and extended structures.
- In this unit, students are introduced to particle models and system modeling as a foundation for later, more detailed atomic modeling.
- MS-ETS1-1 — Define the criteria and constraints of a design problem with sufficient precision to ensure a successful solution.
- Students write clear criteria/constraints for a simple design task (e.g., best cup insulator) and use them to evaluate possible solutions.
Success Criteria — Student Language
- I can explain and follow our lab norms and safety rules, and I can say why they matter.
- I can use lab tools to measure mass, volume, time, or temperature with the right units and careful reading.
- I can make a graph that is labeled correctly and helps someone quickly see patterns in the data.
- I can draw or revise a simple model (particle diagram or system sketch) to show how matter and energy move or change in a situation.
- I can clearly state the criteria and constraints for a design problem, and use them to judge whether a solution meets the goal.
III. Materials and Resources
Tasks & Tools (teacher acquires/curates)
- Lab safety materials:
- Safety contract or norms sheet (goggles, no horseplay, chemical and heat safety, cleanup routines).
- Safety symbols poster and simple case examples of unsafe vs. safe behavior.
- Measurement tools:
- Balances (digital or triple-beam), graduated cylinders, thermometers, rulers/meter sticks, stopwatches.
- Sets of small objects for mass/volume/time measurements (metal washers, marbles, cubes, water in beakers, ice cubes).
- Data and graphing tools:
- Pre-made data tables and blank templates.
- Graph paper or digital graphing tools; example graphs (correct and incorrect).
- Modeling resources:
- Whiteboards or large chart paper for particle diagrams and system diagrams.
- Simple reference images showing particles in solids/liquids/gases.
- Sample energy flow diagrams (e.g., hot water → air, lamp → surroundings).
- Design challenge materials (choose one simple context):
- For an insulated cup challenge: cups, foam, paper, cloth, tape, rubber bands, thermometers, warm water.
- Or for a spill-minimizing device: containers, funnels, trays, various materials to shape a guide or barrier.
- Graphic organizers:
- “Lab Norms & Why They Matter” chart.
- “Measurement & Error” organizer (tool, reading, unit, possible source of error).
- “Graphing Checklist” (title, axes, units, scale, plotted points).
- “System Model” template (inputs → process → outputs).
- “Criteria & Constraints” template for the design problem.
Preparation
- Set up and post lab safety norms and visuals before Session 1.
- Prepare stations with measurement tools and labeled tasks (e.g., “Find the mass of…”, “Measure the volume of…”).
- Pre-select a simple phenomenon to model (e.g., an ice cube melting in a cup of water, hot water cooling, or a ball rolling on a ramp).
- Decide on a design challenge that fits your materials and time (e.g., keep water warm/cool for 10 minutes, minimize dripping when pouring).
- Prepare example graphs and models (both strong and flawed) to use as discussion prompts.
Common Misconceptions to Surface
- “Safety rules are just to follow the teacher’s directions, not because anything real can go wrong.” → Safety norms protect people, equipment, and data quality.
- “Any number from an instrument is ‘right’ and never needs checking.” → Measurements can have error; careful technique and repeated trials matter.
- “Graphs are just ‘extra art’ after the lab.” → Graphs help reveal patterns, trends, and relationships that are hard to see in a table.
- “Models are exact pictures of reality.” → Models are simplified representations that are useful but always have limitations.
- “Designing is just building something cool.” → Good design starts with clear criteria and constraints, not just random building.
Key Terms (highlight in lessons) lab safety, norms, measurement, accuracy, precision, error, data table, graph, variable, model, particle, system, matter, energy, criteria, constraints, design problem, science and engineering practices
IV. Lesson Procedure
(Each day follows: Launch → Explore → Discuss → Reflect. Timing for a 50–60 minute block.)
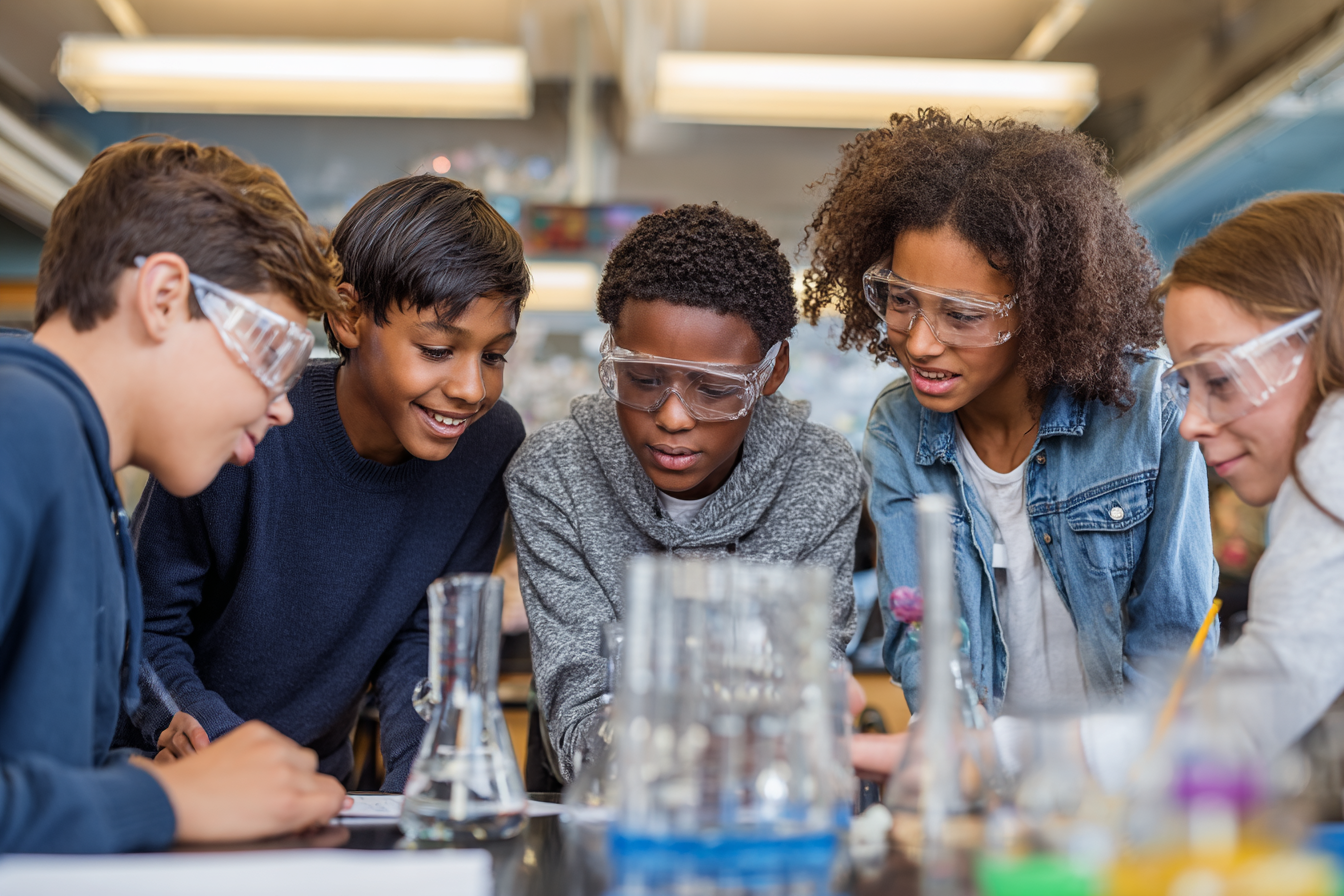
Session 1 — Lab Norms, Safety, and Science Practices
- Launch (6–8 min)
- Present a short cartoon or scenario showing both safe and unsafe lab behavior. Ask: “What’s okay? What’s not okay? Why?”
- Introduce the idea that scientists work with shared norms to keep everyone safe and to collect trustworthy data.
- Explore (22–25 min)
- As a class or in small groups, students review the lab safety contract and safety symbols.
- Using the “Lab Norms & Why They Matter” chart, they:
- List key norms (e.g., wear goggles, no eating/drinking, report spills, follow instructions before touching materials).
- Write why each norm matters (e.g., protects eyes, avoids contamination, keeps data valid).
- Introduce a quick demonstration (teacher-led) showing how ignoring a norm could cause confusion or unsafe conditions (e.g., unlabeled cups of different liquids vs. labeled ones).
- Discuss (10–12 min)
- Whole-class share: Which norms are most important to you and why?
- Introduce science and engineering practices (SEPs) at a high level; highlight that safety and careful work support all SEPs.
- Reflect (5 min)
- Exit ticket: “One lab norm I will always follow is ___ because ___.”
Session 2 — Measurement, Units, and Error
- Launch (6–8 min)
- Show two measurements of the same object (e.g., 27 g and 31 g). Ask: “Which one is right? Could they both be reasonable? Why or why not?”
- Introduce the idea of precision and measurement error.
- Explore (22–25 min)
- Students rotate through measurement stations:
- Measure the mass of objects with a balance (record with units).
- Measure volume of water with graduated cylinders.
- Measure length of objects and time for a simple event (like a ball rolling).
- Using the “Measurement & Error” organizer, students record:
- Tool used, measurement, unit.
- One possible source of error (e.g., reading at an angle, water splashing, starting timer late).
- If time allows, have groups repeat one measurement to see how results vary and discuss why.
- Students rotate through measurement stations:
- Discuss (10–12 min)
- Whole-group: What makes a measurement trustworthy? (clear units, careful reading, appropriate tool, repeated trials).
- Emphasize that NGSS science expects accurate measurements because later we will use them to build models and explanations.
- Reflect (5 min)
- Quick write: “Today I learned that a good measurement needs ___ and that error can happen when ___.”
Session 3 — Graphing and Data Representation
- Launch (6–8 min)
- Show two graphs of the same data: one correctly labeled, one with missing labels/odd scale. Ask: “Which graph helps you understand the data more? Why?”
- Review independent vs. dependent variables at a basic level (if/then or cause/effect).
- Explore (22–25 min)
- Provide a simple shared data set from a teacher demo or previous measurements (e.g., temperature vs. time for cooling water, distance vs. time for a rolling object).
- Students create a data table and then a graph (line or bar, as appropriate) using the Graphing Checklist:
- Title that tells what the graph is about.
- Labeled x-axis and y-axis with units.
- Reasonable scale and clearly plotted points.
- If available, some groups may use a digital tool to compare manual vs. digital graphing.
- Discuss (10–12 min)
- Gallery walk or pair share: students compare graphs using the checklist.
- Ask: “What patterns or trends can we now see that were harder to see in the table?”
- Connect to SEPs: Analyzing and interpreting data often involves graphs.
- Reflect (5 min)
- Exit slip: “A graphing move I will remember is ___ because it helps people see ___.”
Session 4 — Modeling Matter & Energy Systems (MS-PS1-1 prep)
- Launch (5–7 min)
- Show a short video clip or do a simple demo (e.g., ice cube melting in water, hot water cooling, a drop of food coloring spreading). Ask: “What is happening that we can’t see directly?”
- Introduce the idea of particle models and systems thinking.
- Explore (22–25 min)
- In small groups, students choose one phenomenon (e.g., melting ice, cooling water, warm object losing heat).
- Using a System Model template and examples of particle diagrams, they:
- Identify system boundaries (what’s inside vs. outside).
- Sketch inputs, processes, and outputs (e.g., heat energy in/out, matter staying the same or changing state).
- Create a particle model showing how particles might be arranged or moving at the start vs. later (without going deep into full atomic structure yet).
- Groups revise their models once after a short teacher mini-lesson linking their ideas to basic matter/energy concepts (e.g., particles move faster in warmer states).
- Discuss (10–12 min)
- Groups share models in a brief “model carousel,” explaining what each part means and one limitation of their model (something it doesn’t show).
- Connect explicitly to MS-PS1-1: in future units, we’ll build more detailed atomic models using these same skills.
- Reflect (5 min)
- Sentence stem: “My model helped me understand ___ about matter or energy, but it doesn’t show ___, which is a limitation.”
Session 5 — Design Problem: Criteria, Constraints, and Modeling (MS-ETS1-1)
- Launch (5–7 min)
- Present a simple design problem, such as:
- “Design a way to keep a small cup of warm water as warm as possible for 10 minutes using limited materials.”
- Or “Design a way to pour water with minimal spills using simple materials.”
- Explain that today’s focus is defining the problem well, not building full solutions.
- Present a simple design problem, such as:
- Explore (25–30 min)
- In design teams, students use the Criteria & Constraints template to:
- Write criteria (how they will know a solution is successful; e.g., final temperature, amount of water spilled, time limit).
- List constraints (allowed materials, time, size, safety rules).
- Teams sketch a system diagram or simple model of their proposed approach (e.g., where energy will flow in an insulated cup).
- If time allows, they may quickly test one early idea (very short trial) and refine their criteria or constraints for clarity (e.g., adding specific numbers or conditions).
- In design teams, students use the Criteria & Constraints template to:
- Discuss (10–12 min)
- Whole-class or small-group share: each team presents their problem statement, criteria, constraints, and a quick sketch of their model/idea.
- Highlight examples where criteria/constraints are specific and measurable, connecting to MS-ETS1-1 language.
- Reflect (5 min)
- Final reflection: “A good design problem needs criteria like ___ and constraints like ___ so that we can tell if a solution really works.”
V. Differentiation and Accommodations
Advanced Learners
- Challenge students to include quantitative targets in their criteria (e.g., “temperature should drop less than 5°C in 10 minutes”).
- Ask them to compare two different models of the same phenomenon, explaining which is more useful and why.
- Encourage them to identify trade-offs in constraints (e.g., more insulation vs. cost or material use) in their design problem.
Targeted Support
- Provide step-by-step checklists for measurement and graphing (e.g., “Step 1: Zero the balance. Step 2: Place object…”).
- Use partially filled graphs and models that students complete rather than starting from a blank page.
- Offer sentence frames such as:
- “We measured ___ using a ___ and got ___ (unit).”
- “Our model shows that when ___ happens, the particles ___.”
- “Our criteria for success are ___, and our constraints are ___.”
- Pair students strategically for labs (peer coaching for tools and reading scales).
Multilingual Learners
- Provide a visual glossary for key terms: measurement, mass, volume, graph, axis, model, system, criteria, constraints.
- Allow students to annotate diagrams and models in a home language plus English labels.
- Use labeled pictures of tools and processes and model think-alouds during measurement and graphing.
- Allow oral explanations or short phrases on models instead of full sentences, focusing on correct concepts and terms.
IEP/504 & Accessibility
- Break labs into smaller chunks with clear mini-goals (e.g., “Today we only practice mass and volume”).
- Offer extra time or simplified data sets for graphing and modeling.
- Provide large-print safety contracts, tool labels, and graph paper with bold lines as needed.
- Allow use of assistive technology (speech-to-text, digital graphing, virtual lab simulations) where appropriate.
- Let students demonstrate understanding through oral conferences, recorded explanations, or simplified visuals.
VI. Assessment and Evaluation
Formative Checks (daily)
- Session 1 — Lab norms charts show key safety rules with reasonable “why it matters” explanations.
- Session 2 — Measurement organizer entries include tool, value, and correct unit, with at least one realistic source of error described.
- Session 3 — Graphs have titles, labeled axes with units, and generally correct plotting; students can name at least one pattern or trend.
- Session 4 — Models show a coherent idea of systems and particles (even if simple), with at least one stated limitation.
- Session 5 — Criteria & Constraints templates clearly list measurable criteria and realistic constraints for the design problem.
Summative — Science Skills & Modeling Foundations Portfolio (0–2 per criterion, total 10)
- Lab Norms & Safety Understanding
- 2: Clearly explains multiple lab norms, why they matter for safety and data quality, and consistently demonstrates them in work.
- 1: States some norms and reasons but explanations are general or partially incomplete.
- 0: Shows limited understanding or frequent disregard for norms.
- Measurement & Data Quality
- 2: Uses tools correctly with appropriate units and precision; identifies at least one source of error and suggests a way to reduce it.
- 1: Measurements have correct units but may lack precision or error awareness.
- 0: Measurements are often missing, mislabeled, or unrealistic.
- Graphing & Data Representation
- 2: Creates readable graphs with accurate labels, units, and scales; uses graphs to describe at least one pattern or relationship in the data.
- 1: Graphs are mostly correct but have minor labeling or scaling issues; pattern description is vague.
- 0: Graphs are missing or too incomplete to interpret.
- Modeling Matter/Energy Systems (MS-PS1-1 prep)
- 2: Develops and revises a simple particle or system model that reasonably represents a matter/energy situation and acknowledges at least one limitation.
- 1: Provides a model that partially represents the situation but lacks clarity or explicit limitations.
- 0: No meaningful model provided.
- Defining Criteria & Constraints (MS-ETS1-1)
- 2: Clearly defines criteria and constraints for a design problem with enough detail to test solutions (e.g., measurable targets, realistic limits).
- 1: Criteria/constraints are present but vague or difficult to test.
- 0: Criteria and constraints are missing or not relevant to the problem.
Feedback Protocol (TAG)
- Tell one strength (e.g., “Your graph makes it easy to see how the temperature changed over time.”).
- Ask one question (e.g., “What might your model not be showing about the particles?”).
- Give one suggestion (e.g., “Try making your criteria more specific, like adding a time or temperature number.”).
VII. Reflection and Extension
Reflection Prompts
- Which science skill do you feel most confident about now: safety, measurement, graphing, or modeling? Why?
- Which skill is still challenging, and what is one step you can take to improve it in future labs?
- How do models help you think about unseen parts of matter and energy, and how might they change as you learn more this year?
- Why do you think engineers care so much about clear criteria and constraints before they start building?
Extensions
- Skill Refresher Station Lab: Later in the quarter, run quick stations where students must revisit measurement, graphing, and modeling skills using new phenomena.
- Real-World Design Problem: Connect the criteria/constraints work to a local or school issue (e.g., reducing energy loss in classrooms) and brainstorm design ideas together.
- Model Revision Portfolio: As the year progresses, have students collect and revisit early models from this unit, adding notes about how their understanding of matter and energy has changed.
Standards Trace — When Each Standard Is Addressed
- MS-PS1-1 (prep) — Sessions 2–4 (measurement of matter, graphing data, developing and revising particle/system models for simple matter/energy situations).
- MS-ETS1-1 — Session 5 (defining criteria and constraints for a design problem), with reinforcement in future design-focused units.