Hands-On STEM Labs: Engaging Every Learner with Low-Cost, Inquiry-Based Kits
Affordable inquiry-based STEM kits turn any classroom into a rotating lab with recycled materials, simple circuits, and beginner robotics—boosting engagement, equity, and NGSS-aligned learning.

I. Introduction
Many schools face budget constraints that limit students’ access to authentic STEM experiences. Traditional lab equipment is expensive, bulky, and often requires dedicated space—luxuries that under-resourced schools may not have. However, inquiry-based learning, which centers on student-driven questions and iterative experimentation, is proven to deepen understanding and spark lasting curiosity. By creating portable, low-cost STEM kits from recycled materials, basic electronics, and simple robotics components, educators can deliver true lab encounters to every learner, regardless of budget.
Want done-for-you lesson plans for less than $2? Click Here to explore.
This article will guide you through designing and deploying inquiry-based STEM kits in rotating lab stations. You will learn how to assemble affordable, reusable kits; pair them with open-ended challenges like gravity-driven cars and mini-hydroponic gardens; and align each activity to grade-level science standards. Hands-on investigations not only bolster problem-solving skills but also promote equity by offering high-quality STEM exploration for all students. Whether you teach in an urban, suburban, or rural context, these strategies can transform your classroom into a vibrant STEM hub.
II. Why Low-Cost, Inquiry-Based Labs Matter
Research consistently shows that active, hands-on STEM experiences enhance concept retention, foster critical thinking, and increase student motivation—especially among groups traditionally underrepresented in STEM fields. When learners manipulate materials, test hypotheses, and debug their own designs, they develop a deeper grasp of scientific principles than through lectures or worksheets alone. Unfortunately, high-priced equipment and dedicated lab spaces can create barriers that perpetuate achievement gaps: students in well-funded schools enjoy ample resources, while those in under-resourced settings miss out.
Low-cost, inquiry-based labs democratize STEM by enabling any classroom to host rotating stations without a hefty price tag. Recycled cardboard, plastic bottles, and foam board combine with inexpensive circuitry elements—battery holders, LEDs, simple sensors—plus affordable microcontrollers (such as Micro:bit or Arduino Nano) to form the core of portable kits. These components support a wide range of open-ended challenges that tap into physics, life science, and engineering design. By prioritizing creativity, iteration, and collaboration, teachers can ensure equitable access to meaningful STEM experiences that ignite curiosity and foster essential 21st-century skills.
III. Core Components of Inquiry-Based STEM Kits
Effective STEM kits strike a balance between affordability, durability, and versatility. Each kit should be portable—stored in a small tote or plastic bin—reusable across multiple cohorts and safe for students to handle independently or in small groups. The main components fall into three categories: (1) recycled structural materials, (2) basic circuitry and physics modules, and (3) simple robotics and programmable elements.
Recycled structural materials serve as the backbone of many projects: cardboard sheets sourced from discarded boxes, plastic bottles repurposed from the cafeteria, and foam board scraps scavenged from local businesses. These items form chassis for gravity-driven cars, frames for mini-greenhouses, and platforms for circuit-based art. Basic circuitry components include common electronic parts: battery holders (9V or AA), LEDs, resistors (220 Ω), alligator-clip wires, passive buzzers, and simple sensors like tilt switches. These parts introduce students to electricity fundamentals and allow for quick experimentation. Finally, simple robotics modules—entry-level microcontrollers (Micro:bit, Arduino Nano), small DC motors with wheels or propellers, and mini servo motors—bring a programmable dimension, letting students code basic movements and incorporate automation into their designs.
Core Components List:
- Recycled Structural Materials: • Cardboard (food boxes, poster board) • Plastic bottles (water bottles, soda bottles) • Foam board scraps, wooden skewers, zip ties
- Basic Circuitry: • 9V battery clips or AA-battery holders • LEDs (various colors) and resistors (220 Ω) • Alligator-clip wires, mini buzzers, simple tilt sensors
- Simple Robotics/Programmable Modules: • Micro:bit or Arduino Nano microcontrollers • Small DC motors with wheels or propellers • Mini servo motors, jumper wires, small breadboard (optional)
- Tool Kit Essentials: • Scissors, hot glue gun (supervised), masking tape • Rulers, markers, pencils • Kid-safe screwdrivers, pliers (for more advanced kits)
IV. Sample Inquiry Challenges
Pairing each kit with an open-ended challenge engages students in authentic problem-solving. Below are examples spanning various grade levels and tapping into physics, life science, and engineering design. Each prompt encourages hypothesis formulation, iterative design, and reflective documentation—key elements of inquiry learning.
1. Gravity-Driven Car (Grades 3–5)
- Challenge: Use recycled cardboard, plastic wheels (scavenged from old toys), and wooden dowels to build a small car that rolls downhill under gravity alone.
- Inquiry Focus: Understanding potential vs. kinetic energy, friction, and the effects of mass distribution on speed.
- Standards Alignment (NGSS): • 3-PS2-1: Plan and conduct investigations to provide evidence of the effects of balanced and unbalanced forces on the motion of an object. • 3-5-ETS1: Engineering Design (define a simple design problem reflecting a need, generate and compare multiple possible solutions).
- Open-Ended Extensions: Experiment with different ramp angles, surface textures, or wheel sizes. Test which designs travel farthest or fastest and explain why.
2. Simple Circuit Art (Grades 4–6)
- Challenge: Create a piece of “light-up” art by embedding LEDs, battery holders, and copper tape onto a cardboard canvas. Students can design greeting cards, posters, or dioramas that incorporate illuminated elements.
- Inquiry Focus: Exploring series vs. parallel circuits, visualizing current flow, and debugging faulty connections.
- Standards Alignment (NGSS): • 4-PS3-2: Make observations to provide evidence that energy can be transferred in various ways and between objects. • 4-ETS1-2: Develop a simple sketch, drawing, or physical model to illustrate how the shape of an object helps it function as needed to solve a given problem.
- Open-Ended Extensions: Challenge students to incorporate switches, multiple LED colors, or sound elements (buzzer). Ask them to predict which circuit configuration will light multiple LEDs and then test their predictions.
3. Mini-Hydroponic Garden (Grades 5–8)
- Challenge: Build a tabletop hydroponic system using plastic bottles, small water pumps (reclaimed from aquariums), and seedling trays. Students grow lettuce or herbs in water without soil, monitoring growth conditions.
- Inquiry Focus: Plant physiology, nutrient cycles, water chemistry (pH levels), and sustainable agriculture principles.
- Standards Alignment (NGSS): • MS-LS1-5: Construct a scientific explanation based on evidence for how environmental and genetic factors influence the growth of organisms. • MS-ESS2-4: Develop a model to describe the cycling of water through Earth’s systems driven by energy from the sun and the force of gravity.
- Open-Ended Extensions: Investigate optimal pH ranges, light intensities, or nutrient concentrations. Compare growth rates between hydroponic plants and those grown in soil, graphing data trends.
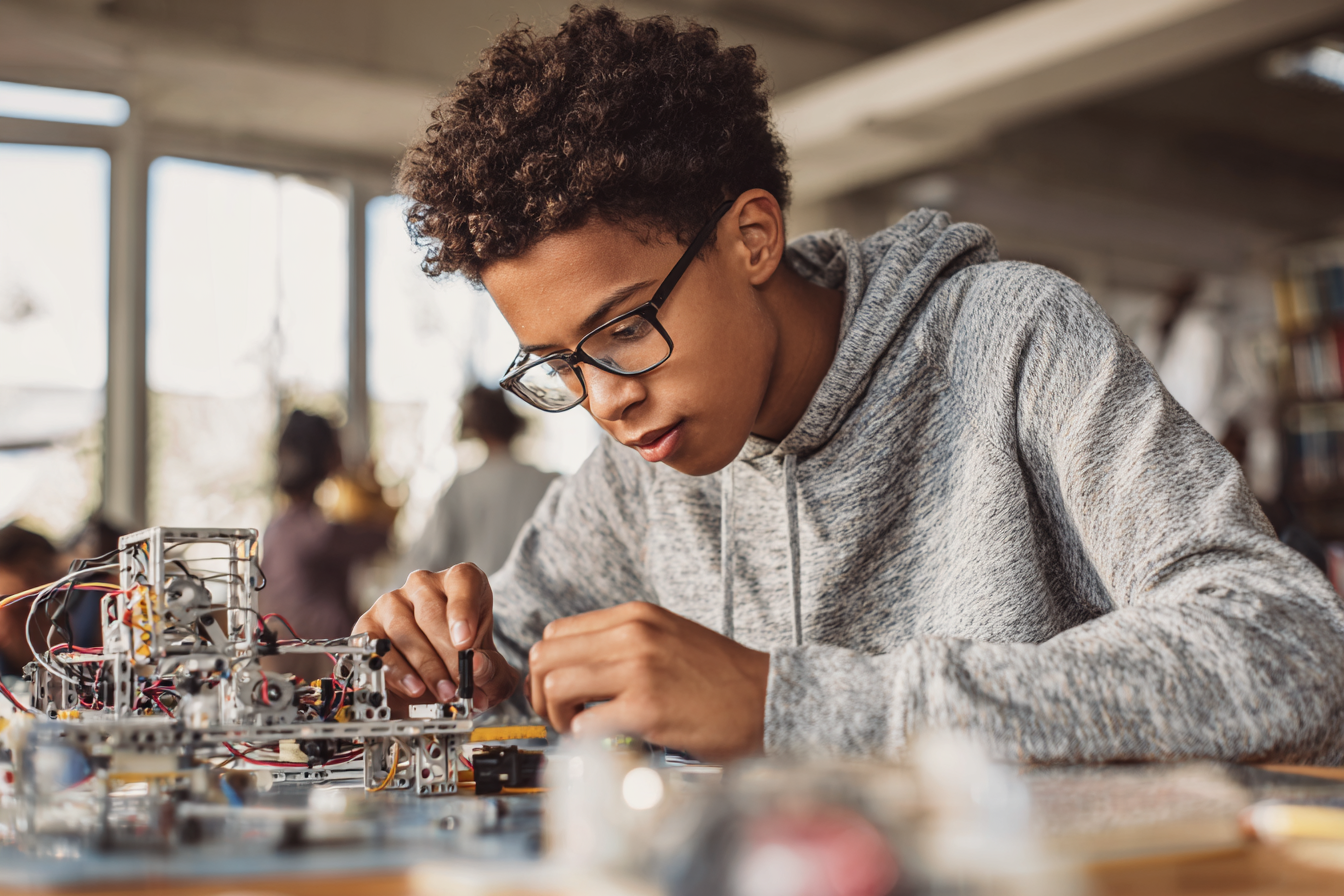
4. Simple Robotic Arm (Grades 6–8)
- Challenge: Assemble a small robotic arm using Micro:bit or Arduino Nano, mini servo motors, and cardboard or foam board segments. Program it (block-based or simple Python) to pick up lightweight objects—such as ping-pong balls or small blocks.
- Inquiry Focus: Mechanical advantage, coordinate movement, basic coding logic, and debugging strategies.
- Standards Alignment (NGSS): • MS-ETS1-4: Develop a model to generate data for iterative testing and modification of a proposed object, tool, or process. • MS-PS2-2: Plan an investigation to provide evidence that the change in an object’s motion depends on the sum of the forces on the object and the mass of the object.
- Open-Ended Extensions: Challenge students to modify grip strength, speed of movement, or automate a simple repetitive task. Evaluate performance differences when lifting objects of varying weight.
5. Balloon-Powered Roller (Grades K–2)
- Challenge: Design a vehicle that propels itself forward using the force of air escaping from an inflated balloon. Students build on a basic chassis (cardboard or foam board) with wheels attached and a balloon nozzle.
- Inquiry Focus: Understanding air pressure, push/pull forces, motion, and iterative design for stability and distance.
- Standards Alignment (NGSS): • K-PS2-1: Plan and conduct an investigation to compare the effects of different strengths or directions of pushes and pulls on the motion of an object. • K-2-ETS1-2: Develop a simple sketch, drawing, or physical model to illustrate how the shape of an object helps it function as needed to solve a given problem.
- Open-Ended Extensions: Test different balloon sizes, chassis shapes, or wheel configurations. Measure how far each design travels and graph the results.
V. Aligning Kits to Grade-Level Standards
To ensure that hands-on activities support curriculum goals, each kit and associated challenge should map clearly to grade-level science standards. Aligning to NGSS (Next Generation Science Standards) or state benchmarks guarantees that inquiry labs supplement, rather than distract from, required content. Teachers can reference performance expectations to identify which aspects of a challenge address specific disciplinary core ideas and crosscutting concepts.
For instance, the Gravity-Driven Car experiment directly addresses 3-PS2-1 by having students plan and conduct investigations to provide evidence of balanced and unbalanced forces. Similarly, developing a Mini-Hydroponic Garden addresses MS-LS1-5 by prompting explanations for how environmental factors influence plant growth. Explicitly stating these standard connections within lesson plans empowers educators to justify kit usage, design formative assessments aligned to objectives, and monitor student mastery systematically.
Alignment Tips:
- Identify Performance Expectations: Review grade-level NGSS or state standards to pinpoint specific performance expectations that match the challenge.
- Tag Lab Elements: Label each kit’s components and instructional steps with corresponding NGSS codes (e.g., “3-PS2-1”).
- Design Formative Checks: Create quick exit tickets or quizzes asking students to explain observed phenomena (e.g., “How did changing the ramp angle affect your car’s speed?”).
- Integrate Crosscutting Concepts: Prompt students to connect investigations to broader themes—pattern recognition, cause and effect, and system models.
- Document Student Evidence: Use digital portfolios or lab notebooks to collect photos, videos, and written reflections tied to specific standards, enabling teachers to track growth over time.
VI. Assembling and Managing Portable STEM Kits
To facilitate rotating lab stations, each STEM kit must be organized, stored, and maintained systematically. Portable kits should be housed in labeled totes or plastic bins that teachers and students can quickly access. A printed “Lab Guide” stored in each kit provides an overview of materials, setup instructions, safety reminders, and challenge prompts. Proper organization and inventory management ensure that kits remain complete, durable, and ready for student use.
Schools can assemble multiple copies of each kit to accommodate small-group rotations of three to four students. Components should be durable—prioritizing reusable parts like microcontrollers and motors—and standardized so that students can transition from one station to the next seamlessly. Establishing a rotating schedule (e.g., 20-minute lab rotations) maximizes student engagement while minimizing downtime. Clear cleanup procedures and maintenance protocols maintain kit longevity and reduce the burden on teachers.
Kit Assembly and Management Steps:
- Inventory Checklist: Develop a detailed parts list for each kit. For example, a Gravity Car Kit might include “4 wheels, 1 rubber band, 1 cardboard chassis, 2 wooden dowels.”
- Tote Labeling: Clearly label each bin with the kit name, grade range, and challenge summary to avoid confusion. Use color-coded stickers or printed labels.
- Durability Upgrades: Reinforce fragile parts with hot glue or duct tape. Use plastic containers with secure lids to protect electronics during storage.
- Rotation Schedule Template: Create a chart assigning student groups to stations in timed intervals (e.g., Station A: 2:00–2:20 PM; Station B: 2:20–2:40 PM). Post this schedule in the classroom for quick reference.
- Maintenance Protocol: Assign students or a designated “Lab Manager” to check kit contents weekly, replacing missing or broken parts and recharging batteries or microcontrollers.
- Safety & Cleanup Guidelines: Include a quick reference card in each bin listing safety rules (e.g., “Handle scissors carefully,” “Disconnect power when not in use”) and cleanup steps (e.g., “Return all parts to labeled compartments”).
VII. Implementation Steps
Introducing hands-on STEM labs requires strategic planning, teacher training, and ongoing refinement. The following steps outline a phased rollout to ensure success:
- Form the STEM Committee: • Include science teachers from different grade levels, a technology coach, and an administrator. • Define roles: kit coordinator (oversees assembly and maintenance), training lead (organizes professional development), scheduling manager, and data collector (monitors outcomes).
- Select a Pilot Grade Level: • Choose one grade (for example, 5th grade) to test Gravity-Driven Car and Circuit Art kits. • Align pilot challenges to existing curriculum units, ensuring seamless integration into lesson plans.
- Assemble Pilot Kits: • Gather recycled materials—cardboard, plastic bottles—through a schoolwide collection drive. • Purchase basic circuitry components in bulk (LEDs, battery holders, micro:bits) from online suppliers to minimize cost. • Assemble three to four duplicates of each kit in labeled bins with printed Lab Guides and safety checklists.
- Conduct Teacher Training: • Host a 2-hour workshop where educators build sample projects, troubleshoot common issues, and learn inquiry-facilitation techniques—asking open-ended questions, guiding student exploration. • Provide demonstration videos and written instructions that teachers can reference later.
- Schedule Rotating Lab Stations: • Develop a rotation chart dividing a 60-minute block into 15–20 minute stations. Groups rotate: Station A (Gravity Car), Station B (Circuit Art), Station C (Hydroponics), Station D (Robotic Arm). • Include a 3–5 minute buffer for setup and cleanup to minimize downtime and confusion.
- Implement Formative Assessments: • Create exit tickets tied to NGSS performance expectations (e.g., “Explain how your car’s design influenced friction and speed”). • Use quick photo or video documentation—students upload pictures of their projects with captions explaining their design choices.
- Gather Feedback and Refine: • After two to three lab cycles, survey students and teachers on kit usability, clarity of instructions, and engagement levels. • Adjust kit contents, Lab Guide instructions, or rotation schedules based on collected feedback. Iterate continuously.
- Scale Across Grades: • Use pilot data to refine kits for other grade levels (e.g., Balloon-Powered Rollers for K–2, Mini-Hydroponics for 7–8). • Provide refresher training workshops for new staff and rotate kit themes seasonally to maintain freshness and enthusiasm.
By following these steps and maintaining open lines of communication, schools can systematically embed hands-on, inquiry-based STEM labs into daily routines, ensuring that every student has the opportunity to engage deeply with science.
VIII. Overcoming Common Challenges
Introducing low-cost STEM kits often reveals obstacles—limited budgets, teacher comfort levels, and logistical issues. Anticipating these challenges and deploying targeted solutions fosters sustainability.
Budget Constraints Gather donated recyclables through parent–teacher associations or local businesses. Seek community partnerships with electronics recyclers to obtain usable components like DC motors or small batteries. Apply for micro-grants from local foundations or STEM-focused nonprofits. When purchasing, buy in bulk: resistors, LEDs, jumper wires, and Micro:bit boards can be significantly cheaper when purchased in class sets.
Teacher Comfort with Materials Some educators may feel intimidated by electronics or robotics components. Address this by offering concise, hands-on training sessions and curated “How-To” videos demonstrating sample builds and common troubleshooting techniques. Pair novice teachers with more experienced mentors or technology coaches who can provide in-class support during the first few lab cycles.
Enjoy science fiction? Check out my space books HERE on Amazon!
Storage and Maintenance Without proper management, kits can quickly lose parts or become disorganized. Assign student “Lab Managers” or teacher “Kit Coordinators” to perform weekly inventory checks and notify staff when supplies run low. Use stackable plastic bins with secure lids, labeled externally, to protect electronics. Designate a central “STEM Closet” or shelf where all kits are stored when not in use.
Ensuring Equity of Access To prevent certain classes or students from monopolizing kits, develop a rotation schedule visible to all teachers. Regularly audit usage logs to confirm every class receives equal lab time. If additional kits are needed, stagger purchases over multiple budget cycles so expansion remains affordable.
Aligning to Curriculum Teachers may worry that labs will sidetrack essential content. Mitigate this by mapping each challenge to specific NGSS or state standards and embedding labs into existing units. For example, if a 4th-grade unit on energy transfer is scheduled, the Gravity-Driven Car lab becomes a unit capstone rather than a diversion. Provide lesson plan templates highlighting how labs address performance expectations, guiding teachers in planning and assessment.
IX. Case Studies and Examples
1. Suburban Elementary—Gravity Car Lab
- Context: A 4th-grade team aimed to boost engagement in a unit on energy and motion. Traditional textbook examples failed to inspire many learners.
- Implementation: A STEM Committee assembled four Gravity-Driven Car kits from recycled cardboard, plastic wheels sourced from discarded toy cars, and wooden dowels. Each lab station featured an adjustable ramp, allowing students to test designs at varying incline angles. Students worked in groups of four, iteratively designing car chassis, swapping wheels, and tweaking weight distribution to maximize distance traveled. Exit tickets prompted them to explain how ramp angle influenced speed and friction.
- Outcome: Over three lab rotations, 94% of students correctly described the energy transformations from potential to kinetic, up from 68% in a pre-assessment. Student engagement surveys indicated a 40% increase in interest in physics topics. Teachers noted fewer off-topic distractions, as students were keen to refine their designs.
2. Urban Middle School—Circuit Art Exploration
- Context: A 6th-grade science teacher wanted to integrate electricity concepts with creative expression to reach art-inclined learners.
- Implementation: Six Circuit Art kits were assembled using copper tape, LEDs, coin-cell batteries, and sheets of heavyweight cardstock. Each station provided markers and decorative materials so students could design light-up greeting cards or posters. After an initial demonstration of series and parallel circuits, students planned their light paths, applied copper tape, and tested LED placements. They documented trial-and-error processes in engineering notebooks, noting why certain configurations failed and how they resolved them.
- Outcome: Post-lab quizzes showed a 30% improvement in students’ ability to identify circuit types and predict outcomes. The art integration boosted buy-in—students who typically avoided STEM topics eagerly engaged with the challenge. Several projects were displayed at a school open house, inspiring younger students to pursue similar experiments.
3. Rural High School—Mini-Hydroponic Gardens
- Context: Limited access to traditional lab facilities in a rural setting led an 8th-grade cohort to seek alternative life science experiences.
- Implementation: The STEM Committee repurposed plastic water bottles and small submersible aquarium pumps to build eight Mini-Hydroponic Garden kits. Each kit included nutrient solution packets, seedling trays, tubing, and a simple pH strip kit. Over a six-week period, student groups researched optimal pH ranges, assembled their hydroponic systems, and monitored growth rates of lettuce seedlings. They recorded daily water levels, nutrient concentrations, and light exposure, graphing data trends and making adjustments to improve yield.
- Outcome: Eighty-five percent of students accurately explained plant nutrient uptake and the role of hydroponic systems in sustainable agriculture on end-of-unit assessments. Attendance improved during the hydroponics unit, as students were motivated to tend to their plants daily. Local news coverage of the project garnered community support, leading to a small grant that expanded the program for future classes.
X. Practical Tips for Teachers
Implementing low-cost, inquiry-based STEM labs becomes more effective when teachers have actionable guidance. These tips will help you maximize impact, streamline logistics, and sustain engagement for every learner.
- Start with Recycled Basics: • Launch a schoolwide drive to collect cardboard, plastic containers, and other recyclables—set up labeled bins in the main hallway. • Engage community partners (restaurants, grocery stores) to donate clean cardboard boxes and plastic bottles.
- Leverage Cost-Effective Electronics: • Purchase Micro:bit or Arduino Nano boards in class packs to share across multiple kits. • Buy resistors, LEDs, jumper wires, and battery holders in bulk from reputable online suppliers (e.g., Adafruit, SparkFun) to reduce per-item cost.
- Provide Clear, Visual Instructions: • Develop step-by-step Lab Guides with photographs or diagrams illustrating each construction phase. • Include troubleshooting tips—e.g., “If the LED doesn’t light, check that the battery is oriented correctly and that copper tape makes full contact.”
- Use Student Lab Managers: • Assign rotating roles—inventory checker, setup lead, cleanup captain—so students take ownership of kit maintenance and organization. • Rotate managers weekly to distribute responsibility and develop leadership skills.
- Rotate Kits and Challenges: • Create a monthly rotation cycle: Gravity Car in September, Circuit Art in October, Hydroponics in November, etc., ensuring exposure to varied STEM domains. • Maintain a shared calendar so every classroom knows when to expect each kit rotation.
- Document Learning and Reflection: • Encourage students to keep lab notebooks—physical or digital—where they record hypotheses, design changes, and final reflections. • Conduct end-of-unit “gallery walks” where students present their projects and discuss successes and failures.
- Collaborate Across Disciplines: • Partner with art teachers to decorate Circuit Art projects or with language arts teachers to write reflections on lab experiences. • Involve math teachers by having students graph data trends—car distances or plant growth rates—reinforcing cross-curricular integration.
- Celebrate STEM Successes: • Showcase standout student projects—fastest gravity car, most robust hydroponic yield—during assemblies or on school social media. • Create a “STEM Wall of Fame” in the hallway displaying photos, student reflections, and data visualizations.
XI. Conclusion
Hands-on, inquiry-based STEM labs powered by low-cost, portable kits can transform classrooms, engaging every learner in critical problem-solving and scientific exploration. By repurposing recycled materials, integrating basic circuitry, and incorporating simple robotics modules, educators can provide meaningful lab experiences without expensive equipment. When paired with open-ended challenges—such as gravity-driven cars, Circuit Art, mini-hydroponic gardens, and robotic arms—these kits align to grade-level standards while fostering creativity, collaboration, and resilience.
Implementing this model requires intentional planning: form a STEM Committee, pilot kits, train teachers, and iteratively refine based on feedback. Over time, portable kits become integral to classroom routines, sparking curiosity and democratizing access to STEM. Whether your school is urban, suburban, or rural, this playbook offers practical strategies to ensure that every student has the opportunity to tinker, test hypotheses, and experience the thrill of discovery. Prioritize hands-on inquiry today, and watch your learners develop into confident problem solvers ready to shape the future.
Want to save time on lesson planning this week? CLICK HERE to explore our library of 1000s of lesson plans for less than $2!
Transform your classroom into an inspiring, vibrant learning space with our beautifully designed printable posters! Perfect for engaging your students and enhancing your teaching environment, our poster bundles cover everything from historical philosophers to animals. CLICK HERE to explore our exclusive collections on Teachers Pay Teachers and give your students the motivational boost they need!